
Embark on a tantalizing culinary adventure at Meals Bar Vestavia, the place the flavors of the sector converge in a colourful and welcoming environment. This culinary haven provides a novel eating enjoy that caters to discerning palates, promising an unforgettable gastronomic journey.
Step inside of and be captivated through the eclectic menu, showcasing a symphony of dishes that draw inspiration from various culinary traditions. Every dish is meticulously crafted the use of recent, seasonal elements, making sure a burst of flavors with each and every chew.
Evaluation of Meals Bar Vestavia
Established in 2015, Meals Bar Vestavia has develop into a liked culinary vacation spot within the middle of Vestavia Hills. The concept that used to be born from a need to create an area the place buyers may take pleasure in recent, healthy, and flavorful dishes in an off-the-cuff and inviting environment.
The meals bar’s environment is each inviting and complex, with heat lights, uncovered brick partitions, and communal seating that encourages a way of neighborhood. The menu is eclectic, that includes a various vary of culinary creations impressed through world flavors and seasonal elements.
Goal Target market
Meals Bar Vestavia caters to a various clientele, from younger pros and households to scholars and locals. The menu provides one thing for everybody, whether or not it is a fast lunch, a leisurely dinner, or a late-night snack. The bar additionally boasts an in depth number of craft beers, wines, and cocktails, making it a well-liked spot for after-work beverages and social gatherings.
Menu and Delicacies

Meals Bar Vestavia’s menu is an eclectic mix of culinary influences, providing a various vary of dishes that cater to quite a lot of tastes and personal tastes. From vintage American convenience meals to globally impressed creations, there is something for everybody to savor.
The menu is arranged into a number of classes, each and every that includes a novel culinary taste or focal point:
Appetizers
- Fried Inexperienced Tomatoes: Crispy fried inexperienced tomatoes served with a tangy remoulade sauce.
- Calamari Fritti: Gentle calamari rings frivolously fried and served with a zesty marinara sauce.
- Deviled Eggs: Creamy and flavorful deviled eggs crowned with crispy bacon and chives.
Salads
Meals Bar Vestavia’s salads are recognized for his or her freshness and colourful flavors:
- Caesar Salad: Vintage Caesar salad with romaine lettuce, Parmesan cheese, croutons, and creamy Caesar dressing.
- Grilled Salmon Salad: Grilled salmon over combined vegetables with quinoa, roasted greens, and a balsamic French dressing.
- Caprese Salad: Recent mozzarella, tomatoes, and basil drizzled with olive oil and balsamic relief.
Sandwiches and Burgers
Bask in a number of mouthwatering sandwiches and burgers:
- Vintage Cheeseburger: Grilled pork patty with American cheese, lettuce, tomato, onion, and pickles on a toasted bun.
- Reuben Sandwich: Corned pork, Swiss cheese, sauerkraut, and Thousand Island dressing on rye bread.
- Grilled Rooster Sandwich: Grilled rooster breast with bacon, avocado, and Swiss cheese on a brioche bun.
Entrees
Meals Bar Vestavia provides a variety of entrees that show off the culinary prowess of the kitchen:
- Pan-Seared Salmon: Completely pan-seared salmon fillet served with roasted asparagus and lemon-herb butter.
- Rooster Piccata: Gentle rooster breasts sautéed in a tangy lemon-caper sauce.
- Braised Quick Ribs: Sluggish-braised brief ribs in a wealthy and flavorful crimson wine sauce.
Truffles
Finish your meal on a candy be aware with Meals Bar Vestavia’s delectable cakes:
- Chocolate Lava Cake: Heat and gooey chocolate lava cake served with vanilla ice cream.
- Cheesecake: Creamy and extravagant cheesecake with a graham cracker crust.
- Apple Pie: Vintage apple pie with a flaky crust and heat, spiced apples.
Beverage Program
Meals Bar Vestavia’s beverage program is punctiliously curated to enrich the culinary choices and reinforce the total eating enjoy.
The menu includes a various vary of each alcoholic and non-alcoholic drinks, making sure that there’s something to meet each and every style and desire.
Alcoholic Drinks
- Craft Beers:A number of native and regional craft beers are to be had on faucet and in bottles, showcasing a lot of types and flavors.
- Wines:An in depth wine listing provides a world number of each vintage and lesser-known varietals, handpicked to pair completely with the meals menu.
- Strong point Cocktails:The bar workforce creates leading edge and seasonal cocktails that make the most of recent elements and artisanal spirits.
Non-Alcoholic Drinks
- Freshly Squeezed Juices:Numerous freshly squeezed juices, together with orange, grapefruit, and apple, are to be had to offer a wholesome and refreshing possibility.
- Craft Sodas:A number of craft sodas, made with herbal elements and no added sugar, be offering a flavorful choice to conventional comfortable beverages.
- Area-Made Iced Teas:Freshly brewed iced teas, infused with herbs and end result, supply a refreshing and caffeine-free possibility.
Beverage Pairing
The beverage workforce works carefully with the culinary workforce to make certain that each and every beverage enhances the dishes at the menu.
The purpose is to reinforce the flavors of the meals and create a harmonious eating enjoy. As an example, a mild and crisp white wine could also be paired with a gentle seafood dish, whilst a full-bodied crimson wine could also be really useful to accompany a hearty steak.
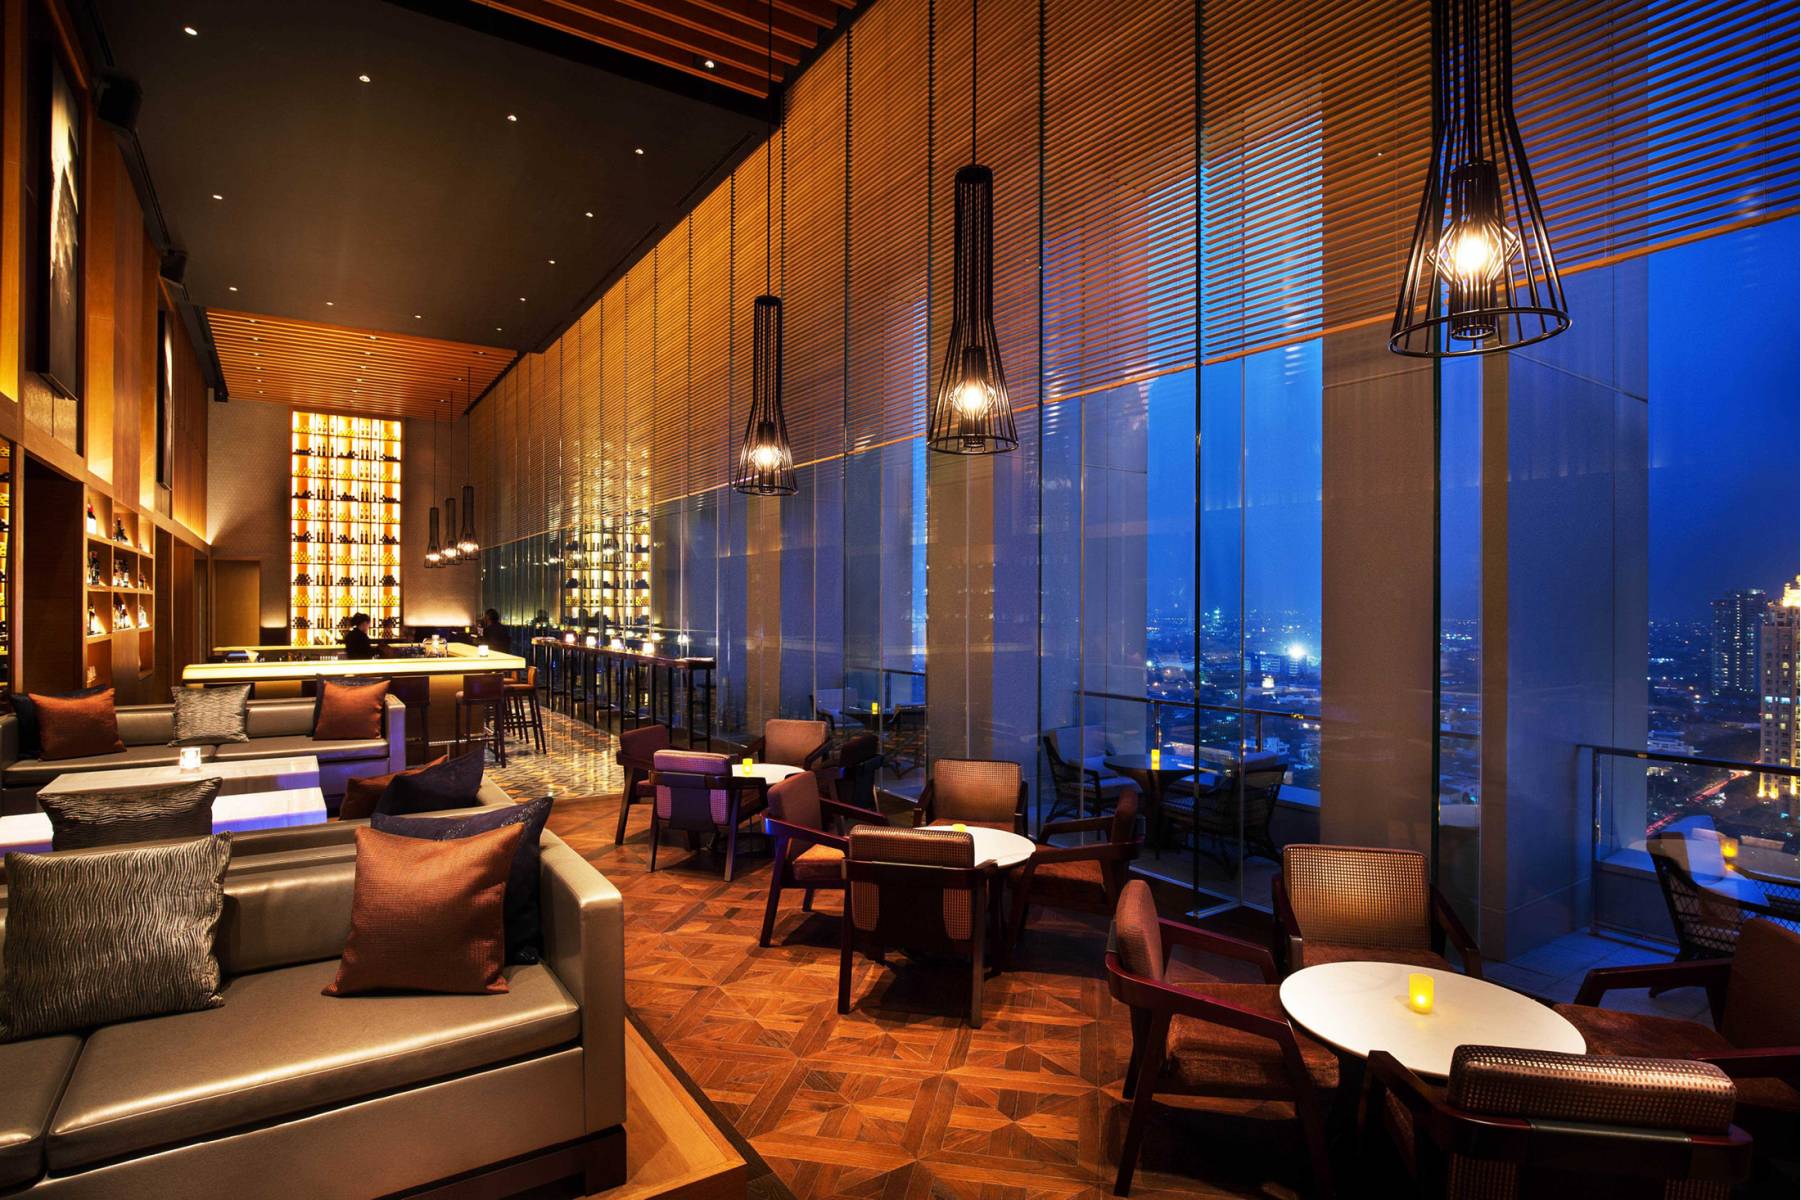
Atmosphere and Surroundings: Meals Bar Vestavia

Meals Bar Vestavia exudes a heat and welcoming environment that enhances its culinary choices. The decor is a tasteful mix of contemporary and rustic parts, that includes uncovered brick partitions, reclaimed wooden accents, and comfortable lights.
The seating preparations cater to quite a lot of personal tastes, from intimate tables for {couples} to communal tables for greater teams. The entire environment is comfy and convivial, encouraging visitors to linger and savor their foods.
Particular Occasions and Reside Leisure
To reinforce the eating enjoy, Meals Bar Vestavia hosts particular occasions and are living leisure all the way through the week. On make a choice evenings, native musicians carry out are living acoustic units, developing a colourful and intimate environment. The bar additionally organizes wine tastings, chef’s dinners, and cooking categories, providing visitors distinctive alternatives to have interaction with the culinary workforce and discover other flavors.
Buyer Carrier and Enjoy
Meals Bar Vestavia takes pleasure in turning in remarkable customer support that complements the eating enjoy for each and every visitor. The workforce is a professional and attentive, going above and past to verify buyers have a memorable time.
From the instant visitors arrive, they’re greeted with heat smiles and authentic hospitality. The workforce is well-versed within the menu and can give detailed suggestions in accordance with personal tastes and nutritional restrictions. They’re proactive in checking in on visitors, refilling beverages, and making sure that every one wishes are met.
Personalised Products and services
To create a extra customized enjoy, Meals Bar Vestavia provides a number of distinctive products and services:
- Nutritional Lodging:The workforce is well-informed about quite a lot of nutritional restrictions and will regulate dishes to cater to express wishes.
- Particular Instance Reputation:Visitors celebrating birthdays or anniversaries are greeted with complimentary cakes and heat needs.
- Reservation Help:The eating place provides on-line reservations and get in touch with give a boost to to make it simple for visitors to protected a desk.
Group Involvement
Meals Bar Vestavia takes pleasure in its deep involvement within the native Vestavia neighborhood. The eating place actively seeks alternatives to spouse with native companies, give a boost to charitable tasks, and take part in neighborhood occasions.
Via those tasks, Meals Bar Vestavia now not handiest strengthens its connection to the neighborhood but additionally contributes to its social cloth, fostering a way of belonging and shared goal.
Partnerships with Native Companies, Meals bar vestavia
- Meals Bar Vestavia has established partnerships with native farms and purveyors to supply recent, high quality elements for its dishes, supporting native agriculture and companies.
- The eating place collaborates with within sight breweries and wineries to supply a curated number of native craft beers and wines, showcasing the area’s culinary choices.
Charitable Projects
- Meals Bar Vestavia frequently donates surplus meals to native meals banks and shelters, addressing meals lack of confidence inside the neighborhood.
- The eating place hosts fundraising occasions to give a boost to quite a lot of charitable organizations, elevating budget for reasons reminiscent of schooling, healthcare, and environmental coverage.
Group Occasions
- Meals Bar Vestavia actively participates in native fairs and farmers’ markets, showcasing its culinary creations and connecting with the neighborhood.
- The eating place hosts cooking categories and workshops, sharing its culinary experience with aspiring cooks and meals lovers.
Best FAQs
What are the signature dishes at Meals Bar Vestavia?
The menu includes a vary of signature dishes, together with the succulent Grilled Octopus with Chorizo and Paprika French dressing, the savory Braised Quick Rib with Creamy Polenta, and the decadent Chocolate Lava Cake with Vanilla Bean Ice Cream.
Is there a get dressed code for Meals Bar Vestavia?
Meals Bar Vestavia maintains an off-the-cuff but refined environment. Whilst formal apparel isn’t required, visitors are inspired to decorate conveniently and correctly for a eating enjoy.
Can I make reservations for Meals Bar Vestavia?
Reservations are extremely really useful, particularly for weekends and particular events. You’ll be able to make reservations on-line or through calling the eating place without delay.

